
by Avantix Learning Team | Updated January 10, 2021
Applies to: Microsoft ® Word ® 2013, 2016, 2019 and 365 (Windows)
You can use mail merge in Microsoft Word to create form letters, labels, envelopes and even a catalog or directory. In this article, we'll review the process for creating form letters for multiple contacts or clients. You'll need to create a main document or letter in Microsoft Word and then connect to a data set of names and addresses in a Word document, Excel worksheet, delimited file or database like Microsoft Access. When you run the mail merge, you have the option of creating a new merged file (which would include a letter for each contact) or merge directly to a printer.
Do you want to learn more about Word? Check out our virtual classroom or live classroom Word courses >
There are 7 steps in the mail merge process to create form letters in Word:
During the mail merge process, fields are inserted into the main document and appear in carets (such as >). By default, when you click in a field, it is displayed with grey shading. When you run the merge, the fields are replaced by data from the source file.
In this article, we'll be using the Mailings tab in the Ribbon to set up and run a mail merge (not the Mail Merge Wizard):
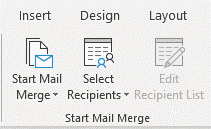
The first step in the mail merge process is to start the merge using Start Mail Merge on the Mailings tab in the Word Ribbon:

To start the merge and specify the main document as a form letter:
The next step is to connect to a source file containing a list of names and addresses using Select Recipients. The source file can be a Microsoft Word document containing a table or delimited data, Excel worksheet or even a table or query in a database such as Microsoft Access. For Word tables and Excel spreadsheets, the first row in the table or worksheet must contain field names such as FirstName, LastName, Company, Address and so on. In a Word source file, there cannot be any paragraphs above the table or data. You can also use a comma or tab delimited file as long as the first line in the document contains field names. In delimited files, the field names and data are separated by a delimiter such as a comma or tab.
Select Recipients appears on the Mailings tab in the Ribbon:
In the following example, note that the field names are in the first row of a Word table which will be used as a source:

In the following Excel example, note that the field names are in the first row of the worksheet which will be used as a source:

To select a Microsoft Word source file containing a table with names and addresses:
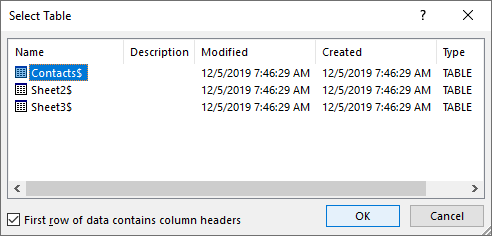
To select a Microsoft Excel source file containing a worksheet with names and addresses:
The following dialog box appears when you select an Excel file as the source for a merge:
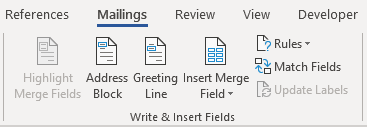
Once you have connected to a source file, you can insert fields into the main document or letter. You have the option of using special Word fields such as Address Block and Greeting Line (for example, to insert Dear John) or inserting individual fields.
Address Block and Greeting Line appear as follows in the Ribbon:
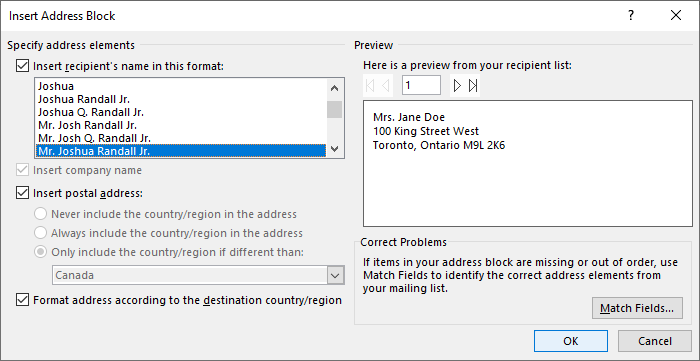
To insert the Address Block field:
For Address Block, select a sample address in the area on the left in the Insert Address Block dialog box:
 dialog box in Word for form letters." width="700" height="361" />
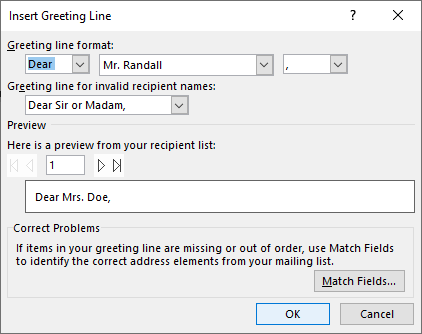
To insert a Greeting Line field:
For Greeting Line, select greeting line options in the Insert Greeting Line dialog box:
 dialog box in Word for form letters." width="422" height="334" />
To insert fields individually:
You may need to apply formatting to the letter such as changing the font and size and adjusting paragraph spacing.
It's common for an Address Block field or address lines to have extra paragraph spacing above and / or below lines in the address when the results are previewed or printed. This is caused by default settings for space above and below paragraphs.
To remove the paragraph spacing:
You have the option of specifying specific recipients or filtering the recipient list if you don't want to create form letters for all contacts in the data source.
To choose specific contacts:
To filter the source list:
For example, below is a filter to display records from Toronto:
 dialog box in Word for mail merge for form letters." width="634" height="285" />
To remove the filter, repeat the process, but click Clear All in the Filter and Sort dialog box.
Before you run the mail merge, you can preview the results:
The final step is to run the merge. You can either create a new merged document or merge directly to a printer.
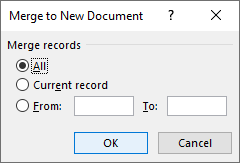
To run the letter mail merge in the main document and create a new merged document:
The following dialog box appears when you select Edit individual documents.
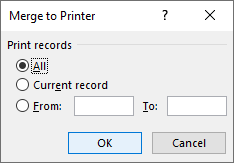
To run the letter mail merge in the main document and print the merged documents:
The following dialog box appears when you select Print Documents:
 dialog box in Word." width="234" height="163" />
You will typically want to save the main document and the source file. If you save the merged file, you will have a record of the letters that were created.
The process is similar for labels. The main document would be labels (usually a label type with a product code) and would connect to the source document in the same way.
This article was first published on December 9, 2019 and has been updated for clarity and content.
Did you find this article helpful? If you would like to receive new articles, join our email list.